Kiss of the Revenant: Difference between revisions
m →Third Chapter: use gallery |
|||
| (25 intermediate revisions by 4 users not shown) | |||
| Line 1: | Line 1: | ||
{{argbox | {{argbox | ||
| float = right | | float = right | ||
| name = | | name = Kiss of the Revenant | ||
| image = File:TSWL BG Image.jpg | | image = File:TSWL BG Image.jpg | ||
| description= The Secret World: Legends puzzle trail, also known as "Kiss of the Revenant". | | description= The Secret World: Legends puzzle trail, also known as "Kiss of the Revenant". | ||
| creator = Alice & Smith / Funcom | | creator = [http://www.aliceandsmith.com/ Alice & Smith] | ||
| type = | | creator2 = [https://www.funcom.com/ Funcom] | ||
| status = | | type = Official | ||
| status = Completed | |||
| discovered = 2017-06-16 | | discovered = 2017-06-16 | ||
| completed = 2017-06-26 | |||
| franchise = https://secretworldlegends.com/ | |||
| header = Header-secret-world-legends.jpg | |||
}} | }} | ||
{{argHeader}} | |||
'''Kiss of the Revenant''' was an ARG related to [https://secretworldlegends.com/ Secret World Legends]. Kiss of the Revenant was released shortly before the "re-launch" of Secret World Legends, which had initially released in 2012 as [https://en.wikipedia.org/wiki/The_Secret_World The Secret World]. By completing the ARG puzzles, Secret World Legends players could claim in-game rewards after the re-launch on June 26, 2017. Kiss of the Revenant was created by [http://www.aliceandsmith.com/ Alice & Smith] in collaboration with [https://www.funcom.com/ Funcom], the developers of The Secret World and Secret World Legends. | |||
__TOC__ | __TOC__ | ||
= Initial Announcement = | = Initial Announcement = | ||
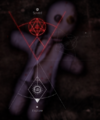
The puzzle | [[File:KissOfTheRevenant.png|thumb|right|200px|The puzzle hosted on mmorpg.com]] | ||
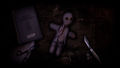
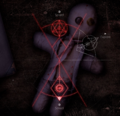
[[File:KissOfTheRevenant_CursedSoul.png|thumb|right|200px|A "cursed soul" being clicked]] | |||
It's started... | On June 16, 2017, the official Black Watchmen Twitter page posted a link to <code>kissoftherevenant.com</code>.<ref>The Black Watchmen [@division66] (June 16, 2017). [https://twitter.com/division66/status/875858321470894081 It's started...] (Tweet). Archived from [https://x.com/division66/status/875858321470894081 the original] on December 2, 2025 – via X.</ref> | ||
The website led to the following message: | |||
<blockquote> | |||
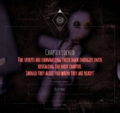
THE SPIRITS ARE CH<b>A</b>NNELING T<b>H</b>EIR EN<b>E</b>RGIES INT<b>O</b> REVEALING THE N<b>E</b>XT CHAP<b>T</b>ER. | |||
</blockquote> | |||
The bolded letters in the message spelled out <code>AHEOET</code>. In the page's source code, every big letter's HTML tag also contained a number; the numbers were <code>98 105 116 46 108 121</code>. When converted from decimal to ASCII, these numbers read <code>bit.ly</code>. This was combined with the bolded letters to get the link <code>bit.ly/AHEOET</code>, which redirected to an animated GIF. The GIF showcased a new "Shadow-Bound" weapon, one of the rewards that players would earn by participating in the ARG:<ref>TSWDB. [https://www.tswdb.com/miscellaneous/downloadable-content/kiss-of-the-revenant-reward-pack/ Kiss of the Revenant Reward Pack] (Accessed December 2, 2025).</ref> | |||
[[File:KissOfTheRevenant_ShadowBound.gif|center|Animated GIF showcasing the Shadow-Bound Pistols]] | |||
[[File: | |||
Furthermore, on the puzzle page, a "cursed soul" would occasionally appear at a random position, and could be clicked by the player. While the purpose of these cursed souls was not initially clear, eventually they were used to unlock [[#Rewards|"rewards"]], to be distributed after the launch of Secret World Legends. | |||
= First Chapter = | = First Chapter = | ||
[[File:KissOfTheRevenant_FirstPuzzleSecretPage.png|thumb|right|The secret page included with the first puzzle | {{#evt: | ||
service=youtube | |||
|id=https://www.youtube.com/watch?v=PIPlCnspuPc | |||
|alignment=right | |||
< | |dimensions=480 | ||
Step closer. Let me see you. Mmmh. You'll do, you'll do. So then, let me tell you a story. | |container=frame | ||
Time was a family lived around here. Tragic. But someone like you? I'm sure you have heard it all before. | }} | ||
Old man Henderson tried to walk away from power. Instead he lost everything... he ever built, everyone he ever loved. | [[File:KissOfTheRevenant_FirstPuzzleSecretPage.png|thumb|right|The secret page included with the first puzzle]] | ||
But this story isn't about him, but about his younger daughter, Samantha, and her struggle to be free of him. | On June 17, 2017, the first puzzle unlocked. Clicking on the puzzle would play a short video, where the player is addressed by a narrator: | ||
I see you found Sam's notebook. Maybe you can finish her work in binding the revenant. | <blockquote> | ||
Hangs around here, y'know. Takes a lot of brains and a lot of guts. But the weapon you make sure'll be worth it. | Step closer. Let me see you. Mmmh. You'll do, you'll do. So then, let me tell you a story.<br> | ||
Time was a family lived around here. Tragic. But someone like you? I'm sure you have heard it all before.<br> | |||
Old man Henderson tried to walk away from power. Instead he lost everything... he ever built, everyone he ever loved.<br> | |||
But this story isn't about him, but about his younger daughter, Samantha, and her struggle to be free of him.<br> | |||
I see you found Sam's notebook. Maybe you can finish her work in binding the revenant.<br> | |||
Hangs around here, y'know. Takes a lot of brains and a lot of guts. But the weapon you make sure'll be worth it.<br> | |||
Come on, see if you can make heads or tails of it. | Come on, see if you can make heads or tails of it. | ||
</ | </blockquote> | ||
"Henderson" refers to Archibald Henderson, a character in Secret World Legends.<ref>Crygaia Wiki. [https://web.archive.org/web/20240305161114/https://wiki.crygaia.org/view/Archibald_Henderson Archibald Henderson]. Archived from [https://wiki.crygaia.org/view/Archibald_Henderson the original] on March 5, 2024.</ref> The video didn't contain any clues needed to solve the puzzle. | |||
< | |||
After the video, a puzzle with the prompt "Draw first upon the ground" was displayed, requiring a 9-letter answer. A "secret page" was accessible from this screen, containing four tarot cards and the hint "That which is lost more than others". The cards displayed are tarot cards from the [[wikipedia:Major Arcana|Major Arcana]] and [[wikipedia:Minor Arcana|Minor Arcana]]: | |||
* [[wikipedia:Three of Swords|Three of Swords]], without the swords | * [[wikipedia:Three of Swords|Three of Swords]], without the swords | ||
* [[wikipedia:The Moon (Tarot card)|The Moon]], without the moon | * [[wikipedia:The Moon (Tarot card)|The Moon]], without the moon | ||
* [[wikipedia:Five of Cups|Five of Cups]], without the cups | * [[wikipedia:Five of Cups|Five of Cups]], without the cups | ||
* [[wikipedia:Page of Wands|Page of Wands]], without the wand | * [[wikipedia:Page of Wands|Page of Wands]], without the wand | ||
<gallery mode="packed" heights=300px class="center"> | |||
< | Image:KissOfTheRevenant_FirstPuzzle.png|<center>The first puzzle, unsolved</center> | ||
Image:KissOfTheRevenant_FirstPuzzleSolved.png|<center>The first puzzle, solved</center> | |||
</gallery> | |||
The only tarot suit that isn't represented in the four tarot cards is the [[wikipedia:Suit of coins|suit of pentacles]]. Pentacles may also be drawn "first upon the ground" at the start of a ritual. As such, the answer to the first puzzle was <code>Pentacles</code>.<ref>@archerpew (June 17, 2017). [https://www.reddit.com/r/SecretWorldLegends/comments/6hqzy9/comment/dj0wp01/ The solution is in the post. It's pentacles.] (Reddit comment).</ref> | |||
= Second Chapter = | = Second Chapter = | ||
[[File:KissOfTheRevenant_SecondPuzzleSecretPage.png|thumb|right|The secret page included with the second puzzle | [[File:KissOfTheRevenant_SecondPuzzleSecretPage.png|thumb|right|The secret page included with the second puzzle]] | ||
On June 18, 2017, the second puzzle unlocked. Clicking on the puzzle played another short video with the following transcript: | |||
< | <blockquote> | ||
Not bad, not bad. | Not bad, not bad.<br> | ||
Maybe you're enough like Sam to get the job done. | Maybe you're enough like Sam to get the job done.<br> | ||
She was smart as a whip, half again as clever as anyone ever gave her credit for... | She was smart as a whip, half again as clever as anyone ever gave her credit for...<br> | ||
</ | Took after her old man like they were peas in a pod. That is why they never got along.<br> | ||
Her pap tried to hide his past from the whole family. But Samantha was well aware of all his secrets.<br> | |||
She never got to Innsmouth herself. Shame. Given she had a talent for power.<br> | |||
When she learned a little from watching her paps, and a little more while rifling through his papers while he was out.<br> | |||
Y'know what they say. A little knowledge is a dangerous thing, friend. | |||
</blockquote> | |||
"Innsmouth" refers to Innsmouth Academy, a location in Secret World Legends.<ref>Crygaia Wiki. [https://web.archive.org/web/20240916030932/https://wiki.crygaia.org/view/Innsmouth_Academy Innsmouth Academy]. Archived from [https://wiki.crygaia.org/view/Innsmouth_Academy the original] on September 16, 2024.</ref> | |||
After the video, a puzzle with the prompt "Dried and held under the tongue" was displayed, requiring a 7-letter answer. Another "secret page" was accessible from this screen, containing the hint "That which is distilled," as well as an image of a berry labelled "Green bottle, square faced... father's basement". | |||
<gallery mode="packed" heights=300px class="center"> | |||
< | Image:KissOfTheRevenant_SecondPuzzle.png|<center>The second puzzle, unsolved</center> | ||
Image:KissOfTheRevenant_SecondPuzzleSolved.png|<center>The second puzzle, solved</center> | |||
</gallery> | |||
</ | |||
The berry depicted on the secret page is a [[wikipedia:Juniper berry|Juniper berry]], which is distilled to make gin. Accordingly, <code>Juniper</code> was the answer to the second puzzle.<ref>@AndiiSFade (June 27, 2017). [https://www.reddit.com/r/SecretWorldLegends/comments/6hqzy9/comment/djci7m7/ To assist those with needing help solving the puzzle, here are the solutions] (Reddit comment).</ref> | |||
<gallery mode=" | = Third Chapter = | ||
Image: | [[File:KissOfTheRevenant_ThirdPuzzleSecretPage.png|thumb|right|The secret page included with the third puzzle.]] | ||
Image: | On June 22, 2017, Funcom hosted a "Beyond the Veil" development stream on their Twitch channel. During this stream, the community reached 13000 total claimed "cursed souls," and the third mission was unlocked. Clicking on the third puzzle played another short video with the following transcript:<ref>Funcom (June 22, 2017). [https://s3.amazonaws.com/cdn.kissoftherevenant.com/video/03-9a53f47b-19dd-40aa-8c63-b253e4f23645.mp4 Third puzzle video].</ref> | ||
<blockquote> | |||
I see you're making progress on Sam's little project.<br> | |||
This was her act of desperation, this ritual she made up...<br> | |||
She was trying to make her tools control her pop's creations.<br> | |||
She was a pure heart and uncorrupted by the darkness around her.<br> | |||
She didn't want power for its own sake, no. She wasn't fighting for the world or against it.<br> | |||
She just wanted something to protect herself so she could steal away with her sweetheart and escape from old man Henderson once and for all.<br> | |||
(A woman laughs.)<br> | |||
Love is sweet; freedom is even sweeter. Keep going, and see how you do. | |||
</blockquote> | |||
The third puzzle had the prompt "Place a replica at the center of the pentacle for the new moon" and required a 2-word phrase; the first word had 6 letters and the second word had 7 letters. The secret page featured the clue "That which is precious" and contained two pictures: an photo of a cathedral labeled "My visit to the St Mary's Cathedral," and a photo of a man with a torn label reading "Uncle George, Bishop of..." The secret page also had a label with no image, reading "M&W 1910 replica of uncle's treasure". | |||
<gallery mode="packed" widths=300px heights=300px class="center"> | |||
Image:KissOfTheRevenant_ThirdPuzzle.png|<center>The third puzzle, unsolved</center> | |||
Image:KissOfTheRevenant_ThirdPuzzleSolved.png|<center>The third puzzle, solved</center> | |||
</gallery> | </gallery> | ||
The cathedral in the photograph is [[wikipedia:St Mary's Cathedral, Limerick|St Mary's Cathedral of Limerick]]. The man labelled "Uncle George" is George Butler, who was once the bishop of St. Mary's Cathedral. During Butler's time as bishop, an artifact called the "Ardagh Chalice" was discovered.<ref>Limerick Diocese. [https://web.archive.org/web/20170729100127/http://www.limerickdiocese.org/bishop.html#9 Bishops of Limerick]. Archived from the original on July 29, 2017.</ref> A replica of the Ardagh Chalice was created in 1910 by Mappin & Webb - the "M&W" mentioned on the secret page.<ref>icollector.com (January 26, 2013). [http://www.icollector.com/1910-Ardagh-Chalice-Celtic-Revival-replica-in-silver-by-Mappin-Webb-of-London_i15272543 1910: Ardagh Chalice Celtic Revival replica in silver by Mappin & Webb of London]</ref> As such, the answer to the third puzzle was <code>Ardagh Chalice</code>.<ref>@AndiiSFade (June 27, 2017). [https://www.reddit.com/r/SecretWorldLegends/comments/6hqzy9/comment/djci7m7/ To assist those with needing help solving the puzzle, here are the solutions] (Reddit comment).</ref> | |||
= Fourth Chapter = | |||
[[File:KissOfTheRevenant_FourthPuzzleSecretPage.png|thumb|right|The secret page included with the fourth puzzle]] | |||
On June 24, 2017, the fourth chapter was unlocked. Clicking on the new chapter played another short video with the following transcript:<ref>Funcom (June 24, 2017). [https://s3.amazonaws.com/cdn.kissoftherevenant.com/video/04-0cbf7003-d18f-4fad-ae51-a9a4e9d52539.mp4 Fourth puzzle video].</ref> | |||
<blockquote> | |||
So far, so good.<br> | |||
You know Sam's story doesn't have a happy ending,<br> | |||
and nothing you do here can change that.<br> | |||
There is one moment of true happiness for Sam and her true love: stealing kisses along the pumpkins.<br> | |||
They say that Jack the Lad had sweet talked Samantha. But it went the other way around. She had a plan and Jack was part of it.<br> | |||
That midnight embrace was an invocation that depowered her weapon. And it almost worked. Almost.<br> | |||
Let's see if you could take that a little further. | |||
</blockquote> | |||
The hint this time was "Spill the blood of the cat", and the answer was 6 letters long. The clue on the secret page read "That which strike terror and fear", and included a "The Magician" tarot card, as well as a few other clues. | |||
<gallery mode="packed" heights=300px class="center"> | |||
File:KissOfTheRevenant_FourthPuzzle.png|<center>The fourth puzzle, unsolved</center> | |||
File:KissOfTheRevenant_FourthPuzzleSolved.png|<center>The fourth puzzle, solved</center> | |||
</gallery> | |||
The initials <code>S.L.M.M.</code> and the year <code>1889</code> from the secret page point to a particular edition of the [[wikipedia:Lesser Key of Solomon|Lesser Key of Solomon]], a grimoire published by S. L. MacGregor Mathers in 1889. The bloody markings on the secret page reading <code>B.II c.VIII</code> point towards Book 2, Chapter 8 of this grimoire, which contains the phrase "strike terror and fear" from the secret page:<ref>Esoteric archives (August 14, 2025). [https://web.archive.org/web/20250926053325/https://www.esotericarchives.com/solomon/ksol2.htm#chap8 The Key of Solomon Book II]. Archived from [https://www.esotericarchives.com/solomon/ksol2.htm#chap8 the original] on September 26, 2025.</ref> | |||
[[ | |||
</ | |||
<blockquote> | |||
< | But as for the '''knife with the black hilt''' (see Figure 62) for making the circle, wherewith to '''strike terror and fear''' into the spirits, it should be made in the same manner, except that it should be done in the day and hour of Saturn, and dipped in the blood of a black cat and in the juice of hemlock, the characters and names a shown in Figure 62 being written thereon, from the point towards the hilt. | ||
</blockquote> | |||
</ | |||
This quote contains the phrase "knife with the black hilt," which fits into the redacted text from the secret page (<code>Witch's xxxxx wxxx txx bxxxx hxxx</code>). Another name for the knife described in this passage is an [[wikipedia:Athame|athame]], and so <code>Athame</code> is the solution to the puzzle.<ref>@AndiiSFade (June 27, 2017). [https://www.reddit.com/r/SecretWorldLegends/comments/6hqzy9/comment/djci7m7/ To assist those with needing help solving the puzzle, here are the solutions] (Reddit comment).</ref> | |||
= Fifth Chapter = | |||
[[File:KissOfTheRevenant_FifthPuzzleSecretPage.png|thumb|right|The secret page included with the fifth puzzle]] | |||
On June 25, 2017, the fifth chapter was unlocked, containing another short video with the following transcript:<ref>Strat-05 [@Strat-05] (June 25, 2017). [https://www.youtube.com/watch?v=Drcm31BdPsA Secret World Legends ARG Kiss of the revenant part 5 walkthrough solution] (YouTube video).</ref> | |||
</ | |||
<blockquote> | |||
And here we take a sharp turn into tragedy.<br> | |||
Sam and Jack found fleeting happiness together, but their moment of sweetness was cut short.<br> | |||
Nobody can say for sure if Old Man Henderson found them together or if his scarecrows did.<br> | |||
But I'm sure that Sam didn't get a chance to end her invocation. She lost her life to her father's scarecrows instead.<br> | |||
You might think this means that she failed. But you'd be wrong. She didn't fail at all. She was successful, beyond her wildest dreams.<br> | |||
You are almost there. You can't stop now. | |||
</blockquote> | |||
The prompt this time was "Fix your gaze on high", and the puzzle required a 10-letter answer. The secret page contained the phrase "That which is brightest" along with a map of constellations. One of the stars was highlighted. | |||
<gallery mode="packed" heights=300px class="center"> | |||
File:KissOfTheRevenant_FifthPuzzle.png|<center>The fifth puzzle, unsolved</center> | |||
File:KissOfTheRevenant_FifthPuzzleSolved.png|<center>The fifth puzzle, solved</center> | |||
</gallery> | |||
The constellation in the center of the image is [[wikipedia:Ophiuchus|Ophiuchus]], and the highlighted star in the image (which happens to be the brightest star in the constellation) is named Rasalhague. Accordingly, <code>Rasalhague</code> is the answer to the fifth puzzle.<ref>@AndiiSFade (June 27, 2017). [https://www.reddit.com/r/SecretWorldLegends/comments/6hqzy9/comment/djci7m7/ To assist those with needing help solving the puzzle, here are the solutions] (Reddit comment).</ref> | |||
= | = The Ritual = | ||
Immediately after completing the fifth chapter, the "ritual" was made available. To complete the ritual, each player had to select their desired weapon, and then choose the correct sequence of 5 symbols (from a total of 6 unique symbols) for that weapon. After a guess, one of the five dots in the middle of the screen would become red if the symbol at that position was correct, and grey if the symbol at that position was incorrect but used elsewhere. Guesses caused an energy meter at the bottom of the screen to reduce, and once the energy bar was empty, players had to wait for the bar to fill up again before making more guesses. Using cardinal directions to indicate the positions of the symbols, the correct sequences were:<ref>@AndiiSFade (June 27, 2017). [https://www.reddit.com/r/SecretWorldLegends/comments/6hqzy9/comment/djci7m7/ To assist those with needing help solving the puzzle, here are the solutions] (Reddit comment).</ref> | |||
After the | |||
<ul> | |||
<li>'''Shadow-Bound Shotgun:''' SW NE SW S N</li> | |||
<li>'''Shadow-Bound Pistol:''' N NE S SE NE</li> | |||
<li>'''Shadow-Bound Blade:''' S NW N SW NW</li> | |||
<li>'''Shadow-Bound Assault Rifle:''' SE N SW S NW</li> | |||
<li>'''Shadow-Bound Hammer:''' N S SW S NW</li> | |||
<li>'''Shadow-Bound Blood Magic Focus:''' S SW NW SW NW</li> | |||
<li>'''Shadow-Bound Elementalism Focus:''' SE S SW SW N</li> | |||
<li>'''Shadow-Bound Fist Weapon:''' NE NE NW SE SW</li> | |||
<li>'''Shadow-Bound Chaos Focus:''' NW N SW S SE</li> | |||
</ul> | |||
Players could then input an email address to receive the code for their item, which would be sent after the launch of Secret World Legends. | |||
The | <gallery mode="packed" heights=280px class="center"> | ||
File:KissOfTheRevenant_RitualSelect.png|<center>Selecting a weapon</center> | |||
File:KissOfTheRevenant_Ritual.png|<center>Selecting symbols</center> | |||
File:KissOfTheRevenant_RitualComplete.png|<center>The ritual is completed</center> | |||
File:KissOfTheRevenant_RitualMoon.png|<center>The end</center> | |||
</gallery> | |||
After completing the ritual, a final video played with the following transcript:<ref>Funcom. [https://s3.amazonaws.com/cdn.kissoftherevenant.com/video/07-8e532506-ed26-4df3-9e2e-56e83821e181.mp4 Final video].</ref> | |||
<blockquote> | |||
Well, I'll be damned. You did it. You captured the monster and lay poor Samantha Henderson to rest at last.<br> | |||
Be careful with that thing though. The revenant is always in there, waiting. He'll come and fight with you. And for you from time to time.<br> | |||
But it's always going to be in there. And if you're not careful... well you know what revenants do.<br> | |||
Watch your back, friend. Or else someone might have to finish your story too. | |||
(A woman laughs.) | |||
</blockquote> | |||
= Rewards = | |||
< | [[File:KissOfTheRevenant_Rewards.png|thumb|right|The in-game rewards earned from the ARG]] | ||
( | After the first puzzle was unlocked, the in-game rewards for the ARG were revealed: | ||
</ | <ol> | ||
<li>A "Shadow-Bound Weapon" (unlocked immediately)</li> | |||
<li>A weapon/talisman distillate (unlocked when the community accumulated 2500 cursed souls)</li> | |||
<li>A Black Watchmen hoodie cosmetic (unlocked when the community accumulated 5000 cursed souls)</li> | |||
<li>A +5 AP and +5 SP potion (unlocked when the community accumulated 7500 cursed souls)</li> | |||
<li>A Black Watchmen jacket cosmetic (unlocked when the community accumulated 15000 cursed souls)</li> | |||
</ol> | |||
Five pieces of artwork were also revealed as a reward for completing each puzzle: | |||
<gallery mode="packed" heights=110px class="center"> | |||
File:KissOfTheRevenant_FirstPuzzleReward.jpg|<center>Artwork revealed after completing the first puzzle, depicting the Black House<ref>Crygaia wiki. [https://web.archive.org/web/20240419004337/https://wiki.crygaia.org/view/The_Black_House_%28Location%29 The Black House (Location)]. Archived April 19, 2024 from the original.</ref></center> | |||
File:KissOfTheRevenant_SecondPuzzleReward.jpg|Artwork revealed after completing the second puzzle, depicting a graveyard | |||
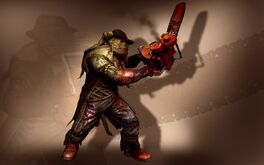
File:KissOfTheRevenant_ThirdPuzzleReward.jpg|Artwork revealed after completing the third puzzle, depicting Jack | |||
File:KissOfTheRevenant_FourthPuzzleReward.jpg|Artwork revealed after completing the fourth puzzle, depicting a revenant | |||
File:KissOfTheRevenant_FifthPuzzleReward.jpg|Artwork revealed after completing the fifth puzzle, depicting a revenant | |||
</gallery> | |||
= Media = | = Media = | ||
| Line 185: | Line 229: | ||
File:KissOfTheRevenant_Rewards2.png|The rewards page as of 20:41GMT 2017-06-18. | File:KissOfTheRevenant_Rewards2.png|The rewards page as of 20:41GMT 2017-06-18. | ||
File:KissOfTheRevenant_Rewards3.png|The rewards page as of 20:36GMT 2017-06-20. Notice the updated second reward. | File:KissOfTheRevenant_Rewards3.png|The rewards page as of 20:36GMT 2017-06-20. Notice the updated second reward. | ||
File:KissOfTheRevenant_Rewards4.png|The rewards page as of 16:19GMT 2017-06-26, with all rewards unlocked. | |||
File:KissOfTheRevenant_FirstPuzzleUnlocked.png|The first puzzle is unlocked. | File:KissOfTheRevenant_FirstPuzzleUnlocked.png|The first puzzle is unlocked. | ||
File:KissOfTheRevenant_FirstPuzzleComplete.png|The 'home' screen after the first puzzle is complete. | File:KissOfTheRevenant_FirstPuzzleComplete.png|The 'home' screen after the first puzzle is complete. | ||
File:KissOfTheRevenant_SecondPuzzleLocked.png|The screen shown when clicking on the second puzzle while it was locked. | File:KissOfTheRevenant_SecondPuzzleLocked.png|The screen shown when clicking on the second puzzle while it was locked. | ||
File:KissOfTheRevenant_SecondPuzzleComplete.png|The 'home' screen after the second puzzle is complete. | File:KissOfTheRevenant_SecondPuzzleComplete.png|The 'home' screen after the second puzzle is complete. | ||
File:KissOfTheRevenant_ThirdPuzzleComplete.png|The 'home' screen after the third puzzle is complete. | File:KissOfTheRevenant_ThirdPuzzleComplete.png|The 'home' screen after the third puzzle is complete. | ||
File:KissOfTheRevenant_FourthPuzzleComplete.png|The 'home' screen after the fourth puzzle is complete. | |||
File:KissOfTheRevenant_FifthPuzzleComplete.png|The 'home' screen after the fifth puzzle is complete. | |||
File:KissOfTheRevenant_SixthPuzzleComplete.png|The 'home' screen after the ritual is complete. | |||
</gallery> | </gallery> | ||
= References = | = References = | ||
<div style="font-size: 12px"> | |||
<references /> | |||
</div> | |||
Latest revision as of 23:57, 2 December 2025
| Kiss of the Revenant | |
|---|---|
| Type | Official |
| Creators | Alice & Smith & Funcom |
| Discovered | 2017-06-16 |
| Completed | 2017-06-26 |

List of Investigations > Kiss of the Revenant
Kiss of the Revenant was an ARG related to Secret World Legends. Kiss of the Revenant was released shortly before the "re-launch" of Secret World Legends, which had initially released in 2012 as The Secret World. By completing the ARG puzzles, Secret World Legends players could claim in-game rewards after the re-launch on June 26, 2017. Kiss of the Revenant was created by Alice & Smith in collaboration with Funcom, the developers of The Secret World and Secret World Legends.
Initial Announcement


On June 16, 2017, the official Black Watchmen Twitter page posted a link to kissoftherevenant.com.[1]
The website led to the following message:
THE SPIRITS ARE CHANNELING THEIR ENERGIES INTO REVEALING THE NEXT CHAPTER.
The bolded letters in the message spelled out AHEOET. In the page's source code, every big letter's HTML tag also contained a number; the numbers were 98 105 116 46 108 121. When converted from decimal to ASCII, these numbers read bit.ly. This was combined with the bolded letters to get the link bit.ly/AHEOET, which redirected to an animated GIF. The GIF showcased a new "Shadow-Bound" weapon, one of the rewards that players would earn by participating in the ARG:[2]

Furthermore, on the puzzle page, a "cursed soul" would occasionally appear at a random position, and could be clicked by the player. While the purpose of these cursed souls was not initially clear, eventually they were used to unlock "rewards", to be distributed after the launch of Secret World Legends.
First Chapter

On June 17, 2017, the first puzzle unlocked. Clicking on the puzzle would play a short video, where the player is addressed by a narrator:
Step closer. Let me see you. Mmmh. You'll do, you'll do. So then, let me tell you a story.
Time was a family lived around here. Tragic. But someone like you? I'm sure you have heard it all before.
Old man Henderson tried to walk away from power. Instead he lost everything... he ever built, everyone he ever loved.
But this story isn't about him, but about his younger daughter, Samantha, and her struggle to be free of him.
I see you found Sam's notebook. Maybe you can finish her work in binding the revenant.
Hangs around here, y'know. Takes a lot of brains and a lot of guts. But the weapon you make sure'll be worth it.
Come on, see if you can make heads or tails of it.
"Henderson" refers to Archibald Henderson, a character in Secret World Legends.[3] The video didn't contain any clues needed to solve the puzzle.
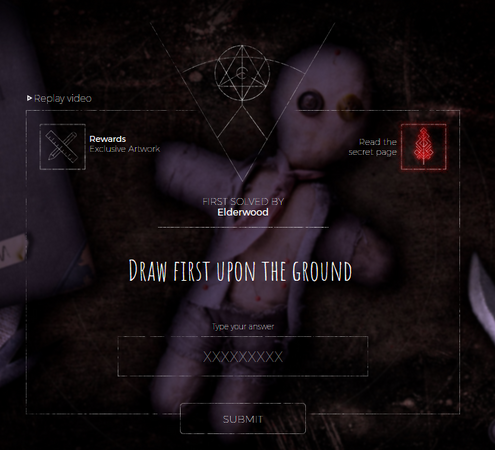
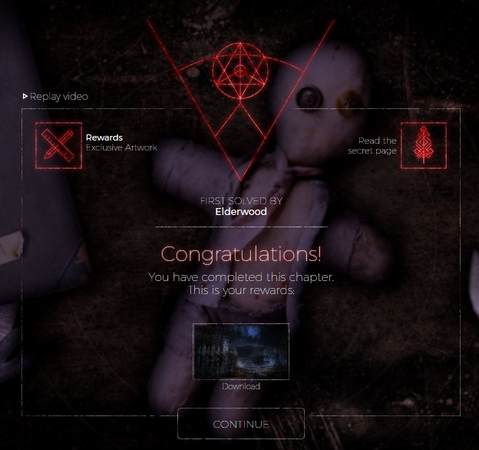
After the video, a puzzle with the prompt "Draw first upon the ground" was displayed, requiring a 9-letter answer. A "secret page" was accessible from this screen, containing four tarot cards and the hint "That which is lost more than others". The cards displayed are tarot cards from the Major Arcana and Minor Arcana:
- Three of Swords, without the swords
- The Moon, without the moon
- Five of Cups, without the cups
- Page of Wands, without the wand
-
The first puzzle, unsolved -
The first puzzle, solved


The only tarot suit that isn't represented in the four tarot cards is the suit of pentacles. Pentacles may also be drawn "first upon the ground" at the start of a ritual. As such, the answer to the first puzzle was Pentacles.[4]
Second Chapter

On June 18, 2017, the second puzzle unlocked. Clicking on the puzzle played another short video with the following transcript:
Not bad, not bad.
Maybe you're enough like Sam to get the job done.
She was smart as a whip, half again as clever as anyone ever gave her credit for...
Took after her old man like they were peas in a pod. That is why they never got along.
Her pap tried to hide his past from the whole family. But Samantha was well aware of all his secrets.
She never got to Innsmouth herself. Shame. Given she had a talent for power.
When she learned a little from watching her paps, and a little more while rifling through his papers while he was out.
Y'know what they say. A little knowledge is a dangerous thing, friend.
"Innsmouth" refers to Innsmouth Academy, a location in Secret World Legends.[5]
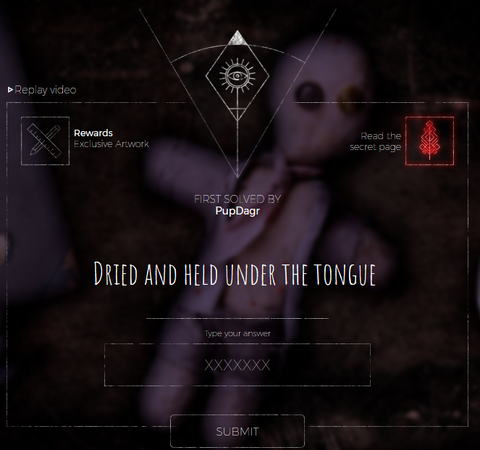
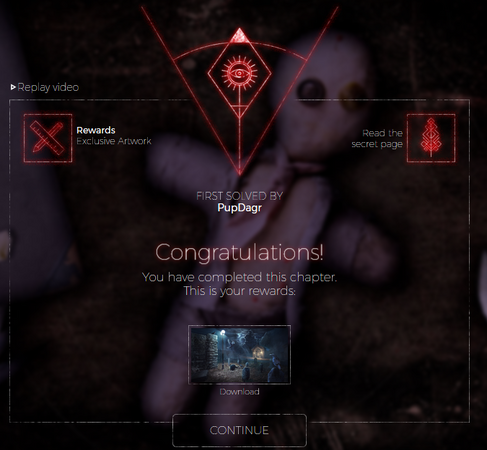
After the video, a puzzle with the prompt "Dried and held under the tongue" was displayed, requiring a 7-letter answer. Another "secret page" was accessible from this screen, containing the hint "That which is distilled," as well as an image of a berry labelled "Green bottle, square faced... father's basement".
-
The second puzzle, unsolved -
The second puzzle, solved


The berry depicted on the secret page is a Juniper berry, which is distilled to make gin. Accordingly, Juniper was the answer to the second puzzle.[6]
Third Chapter

On June 22, 2017, Funcom hosted a "Beyond the Veil" development stream on their Twitch channel. During this stream, the community reached 13000 total claimed "cursed souls," and the third mission was unlocked. Clicking on the third puzzle played another short video with the following transcript:[7]
I see you're making progress on Sam's little project.
This was her act of desperation, this ritual she made up...
She was trying to make her tools control her pop's creations.
She was a pure heart and uncorrupted by the darkness around her.
She didn't want power for its own sake, no. She wasn't fighting for the world or against it.
She just wanted something to protect herself so she could steal away with her sweetheart and escape from old man Henderson once and for all.
(A woman laughs.)
Love is sweet; freedom is even sweeter. Keep going, and see how you do.
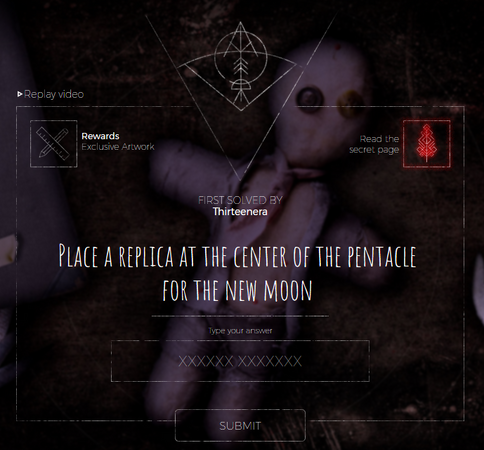
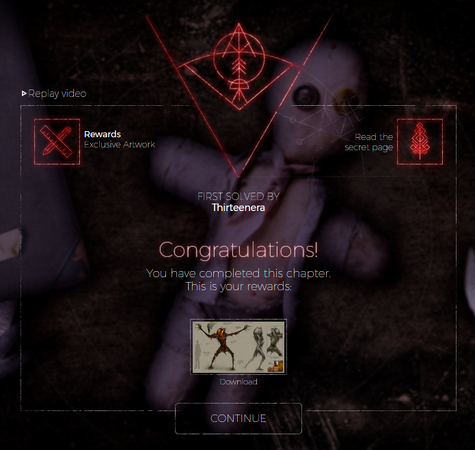
The third puzzle had the prompt "Place a replica at the center of the pentacle for the new moon" and required a 2-word phrase; the first word had 6 letters and the second word had 7 letters. The secret page featured the clue "That which is precious" and contained two pictures: an photo of a cathedral labeled "My visit to the St Mary's Cathedral," and a photo of a man with a torn label reading "Uncle George, Bishop of..." The secret page also had a label with no image, reading "M&W 1910 replica of uncle's treasure".
-
The third puzzle, unsolved -
The third puzzle, solved


The cathedral in the photograph is St Mary's Cathedral of Limerick. The man labelled "Uncle George" is George Butler, who was once the bishop of St. Mary's Cathedral. During Butler's time as bishop, an artifact called the "Ardagh Chalice" was discovered.[8] A replica of the Ardagh Chalice was created in 1910 by Mappin & Webb - the "M&W" mentioned on the secret page.[9] As such, the answer to the third puzzle was Ardagh Chalice.[10]
Fourth Chapter

On June 24, 2017, the fourth chapter was unlocked. Clicking on the new chapter played another short video with the following transcript:[11]
So far, so good.
You know Sam's story doesn't have a happy ending,
and nothing you do here can change that.
There is one moment of true happiness for Sam and her true love: stealing kisses along the pumpkins.
They say that Jack the Lad had sweet talked Samantha. But it went the other way around. She had a plan and Jack was part of it.
That midnight embrace was an invocation that depowered her weapon. And it almost worked. Almost.
Let's see if you could take that a little further.
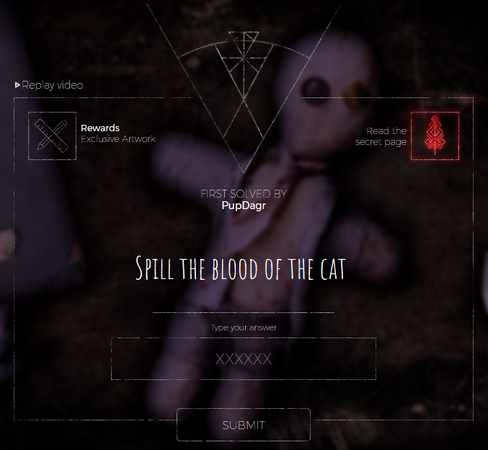
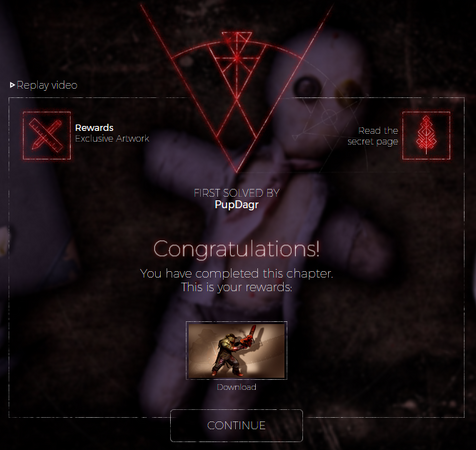
The hint this time was "Spill the blood of the cat", and the answer was 6 letters long. The clue on the secret page read "That which strike terror and fear", and included a "The Magician" tarot card, as well as a few other clues.
-
The fourth puzzle, unsolved -
The fourth puzzle, solved


The initials S.L.M.M. and the year 1889 from the secret page point to a particular edition of the Lesser Key of Solomon, a grimoire published by S. L. MacGregor Mathers in 1889. The bloody markings on the secret page reading B.II c.VIII point towards Book 2, Chapter 8 of this grimoire, which contains the phrase "strike terror and fear" from the secret page:[12]
But as for the knife with the black hilt (see Figure 62) for making the circle, wherewith to strike terror and fear into the spirits, it should be made in the same manner, except that it should be done in the day and hour of Saturn, and dipped in the blood of a black cat and in the juice of hemlock, the characters and names a shown in Figure 62 being written thereon, from the point towards the hilt.
This quote contains the phrase "knife with the black hilt," which fits into the redacted text from the secret page (Witch's xxxxx wxxx txx bxxxx hxxx). Another name for the knife described in this passage is an athame, and so Athame is the solution to the puzzle.[13]
Fifth Chapter

On June 25, 2017, the fifth chapter was unlocked, containing another short video with the following transcript:[14]
And here we take a sharp turn into tragedy.
Sam and Jack found fleeting happiness together, but their moment of sweetness was cut short.
Nobody can say for sure if Old Man Henderson found them together or if his scarecrows did.
But I'm sure that Sam didn't get a chance to end her invocation. She lost her life to her father's scarecrows instead.
You might think this means that she failed. But you'd be wrong. She didn't fail at all. She was successful, beyond her wildest dreams.
You are almost there. You can't stop now.
The prompt this time was "Fix your gaze on high", and the puzzle required a 10-letter answer. The secret page contained the phrase "That which is brightest" along with a map of constellations. One of the stars was highlighted.
-
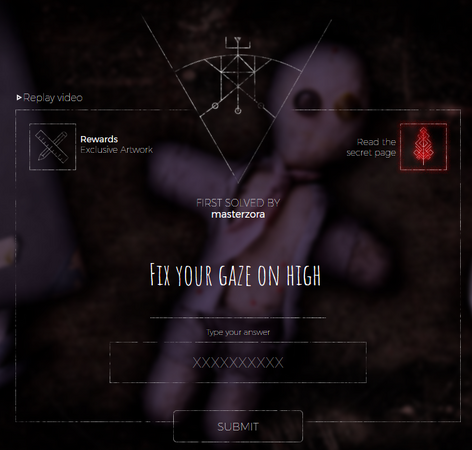
The fifth puzzle, unsolved -
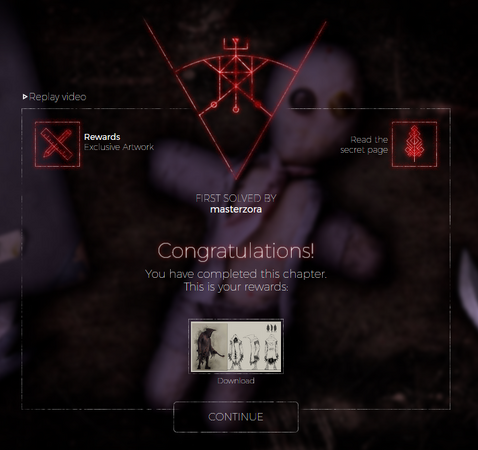
The fifth puzzle, solved


The constellation in the center of the image is Ophiuchus, and the highlighted star in the image (which happens to be the brightest star in the constellation) is named Rasalhague. Accordingly, Rasalhague is the answer to the fifth puzzle.[15]
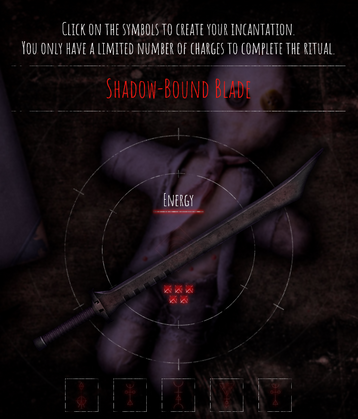
The Ritual
Immediately after completing the fifth chapter, the "ritual" was made available. To complete the ritual, each player had to select their desired weapon, and then choose the correct sequence of 5 symbols (from a total of 6 unique symbols) for that weapon. After a guess, one of the five dots in the middle of the screen would become red if the symbol at that position was correct, and grey if the symbol at that position was incorrect but used elsewhere. Guesses caused an energy meter at the bottom of the screen to reduce, and once the energy bar was empty, players had to wait for the bar to fill up again before making more guesses. Using cardinal directions to indicate the positions of the symbols, the correct sequences were:[16]
- Shadow-Bound Shotgun: SW NE SW S N
- Shadow-Bound Pistol: N NE S SE NE
- Shadow-Bound Blade: S NW N SW NW
- Shadow-Bound Assault Rifle: SE N SW S NW
- Shadow-Bound Hammer: N S SW S NW
- Shadow-Bound Blood Magic Focus: S SW NW SW NW
- Shadow-Bound Elementalism Focus: SE S SW SW N
- Shadow-Bound Fist Weapon: NE NE NW SE SW
- Shadow-Bound Chaos Focus: NW N SW S SE
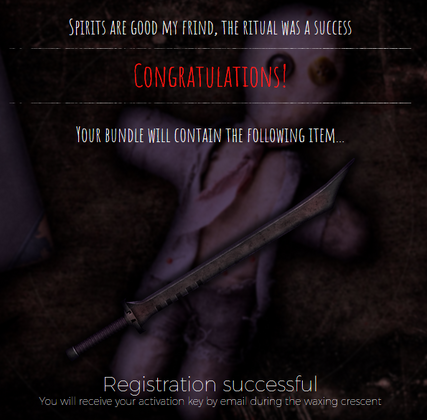
Players could then input an email address to receive the code for their item, which would be sent after the launch of Secret World Legends.
-
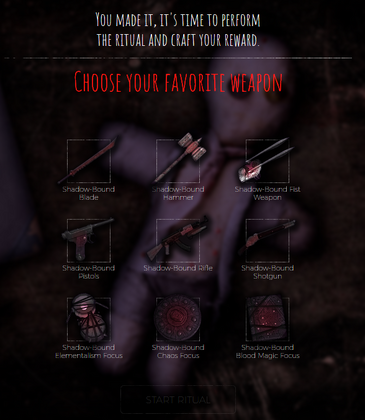
Selecting a weapon -
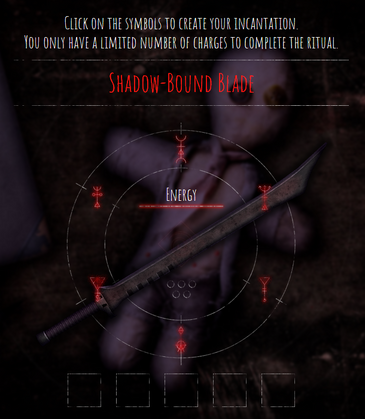
Selecting symbols -
The ritual is completed -
The end


After completing the ritual, a final video played with the following transcript:[17]
Well, I'll be damned. You did it. You captured the monster and lay poor Samantha Henderson to rest at last.
Be careful with that thing though. The revenant is always in there, waiting. He'll come and fight with you. And for you from time to time.
But it's always going to be in there. And if you're not careful... well you know what revenants do.
Watch your back, friend. Or else someone might have to finish your story too. (A woman laughs.)
Rewards

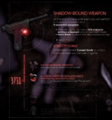
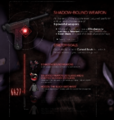
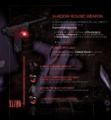
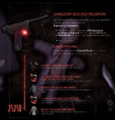
After the first puzzle was unlocked, the in-game rewards for the ARG were revealed:
- A "Shadow-Bound Weapon" (unlocked immediately)
- A weapon/talisman distillate (unlocked when the community accumulated 2500 cursed souls)
- A Black Watchmen hoodie cosmetic (unlocked when the community accumulated 5000 cursed souls)
- A +5 AP and +5 SP potion (unlocked when the community accumulated 7500 cursed souls)
- A Black Watchmen jacket cosmetic (unlocked when the community accumulated 15000 cursed souls)
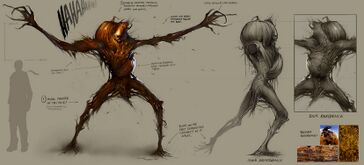
Five pieces of artwork were also revealed as a reward for completing each puzzle:
-
![Artwork revealed after completing the first puzzle, depicting the Black House[18]](/images/thumb/5/55/KissOfTheRevenant_FirstPuzzleReward.jpg/294px-KissOfTheRevenant_FirstPuzzleReward.jpg)
Artwork revealed after completing the first puzzle, depicting the Black House[18] -
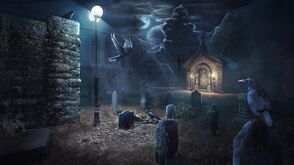 Artwork revealed after completing the second puzzle, depicting a graveyard
 -
 Artwork revealed after completing the third puzzle, depicting Jack
 -
 Artwork revealed after completing the fourth puzzle, depicting a revenant
 -
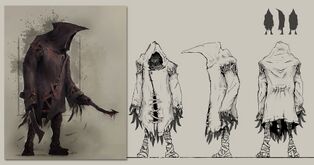 Artwork revealed after completing the fifth puzzle, depicting a revenant
![Artwork revealed after completing the first puzzle, depicting the Black House[18]](/w/File:KissOfTheRevenant_FirstPuzzleReward.jpg)


Media
-
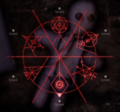
 The full background, only the center is visible in the frame.
 -
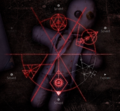
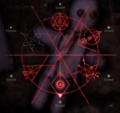
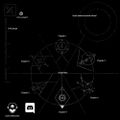 An image showing various icons used. Note that the chapter numbering isn't correct.
 -
 The rewards page as of 08:39GMT 2017-06-18.
 -
 The rewards page as of 20:41GMT 2017-06-18.
 -
 The rewards page as of 20:36GMT 2017-06-20. Notice the updated second reward.
 -
 The rewards page as of 16:19GMT 2017-06-26, with all rewards unlocked.
 -
 The first puzzle is unlocked.
 -
 The 'home' screen after the first puzzle is complete.
 -
 The screen shown when clicking on the second puzzle while it was locked.
 -
 The 'home' screen after the second puzzle is complete.
 -
 The 'home' screen after the third puzzle is complete.
 -
 The 'home' screen after the fourth puzzle is complete.
 -
 The 'home' screen after the fifth puzzle is complete.
 -
 The 'home' screen after the ritual is complete.


References
- ↑ The Black Watchmen [@division66] (June 16, 2017). It's started... (Tweet). Archived from the original on December 2, 2025 – via X.
- ↑ TSWDB. Kiss of the Revenant Reward Pack (Accessed December 2, 2025).
- ↑ Crygaia Wiki. Archibald Henderson. Archived from the original on March 5, 2024.
- ↑ @archerpew (June 17, 2017). The solution is in the post. It's pentacles. (Reddit comment).
- ↑ Crygaia Wiki. Innsmouth Academy. Archived from the original on September 16, 2024.
- ↑ @AndiiSFade (June 27, 2017). To assist those with needing help solving the puzzle, here are the solutions (Reddit comment).
- ↑ Funcom (June 22, 2017). Third puzzle video.
- ↑ Limerick Diocese. Bishops of Limerick. Archived from the original on July 29, 2017.
- ↑ icollector.com (January 26, 2013). 1910: Ardagh Chalice Celtic Revival replica in silver by Mappin & Webb of London
- ↑ @AndiiSFade (June 27, 2017). To assist those with needing help solving the puzzle, here are the solutions (Reddit comment).
- ↑ Funcom (June 24, 2017). Fourth puzzle video.
- ↑ Esoteric archives (August 14, 2025). The Key of Solomon Book II. Archived from the original on September 26, 2025.
- ↑ @AndiiSFade (June 27, 2017). To assist those with needing help solving the puzzle, here are the solutions (Reddit comment).
- ↑ Strat-05 [@Strat-05] (June 25, 2017). Secret World Legends ARG Kiss of the revenant part 5 walkthrough solution (YouTube video).
- ↑ @AndiiSFade (June 27, 2017). To assist those with needing help solving the puzzle, here are the solutions (Reddit comment).
- ↑ @AndiiSFade (June 27, 2017). To assist those with needing help solving the puzzle, here are the solutions (Reddit comment).
- ↑ Funcom. Final video.
- ↑ Crygaia wiki. The Black House (Location). Archived April 19, 2024 from the original.